Pages

Saturday, 17 May 2014

Coconut Rice

One of my favourite things about eating out a Thai restaurant is the piping hot pot of coconut rice that you can order! No matter how full I am, I always seem to go back for another spoonful of it! So when I made my Hoisin Pork Lettuce Wraps for dinner, I just knew that I had to re-create my favourite restaurant side at home! This coconut rice recipe might be one of the tastiest and easiest side dishes I've ever made, it’s truly as easy as cooking rice but the coconut milk gives it such a creamy texture and delicious flavour! It goes great with any Asian or Thai inspired meals that you make and is such a nice break from regular rice. I usually serve brown rice with dinner, but this is one of the times you’ll want to use jasmine rice! It really compliments the flavour of coconut.


 {Fluff it with a fork, and let it stand for 5 minutes}
 
I made a double batch of both and we ate it for lunches the next day as a simple rice dish! One of the nice things about this rice dish is that you don’t need any butter or soy sauce (or your favourite rice dressing) because the flavour is so full and vibrant! And the smell as it cooks is heavenly, that light air of coconut and rice, it's a treat for your nose!


Coconut Rice
This rice is so creamy and delicious that you might just want to skip the main course and eat it all on its own!

Time:
Prep Time: 5 minutes // Cook Time: 20 minutes // Yields: 4 - 6 servings

Ingredients:
  • 2 cups uncooked jasmine rice, rinsed
  • 1 1/4 cup water
  • 1 400 ml can of coconut milk
  • Pinch of salt

Directions:

  • Add all ingredients to a medium sized sauce pot, bring to a boil over high heat then reduce to low, cover and let simmer until rice is fully cooked and liquid is dissolved, stirring occasionally to avoid burning on the bottom, for 15 – 20 minutes. 
  • Remove from heat, fluff with a fork, cover and let sit for 5 minutes. Garnish with finely chopped green onions. 
*One thing to note, is that the coconut milk tends to make the rice burn a bit on the bottom, so make sure you stir it really well and then let it simmer on very low, stirring occasionally throughout cooking time. 

Thursday, 15 May 2014

Hoisin Pork Lettuce Wraps

Every since we moved to Calgary I've been inspired by all the ethnic restaurants to break away from my more traditionally Canadian cooking and experiment with other flavours. Lately I've been very influenced by Asian flavours, which led me to attempting these lettuce wraps. And am I ever glad I did! These wraps make a delicious, light dinner that’s just bursting with flavour!

 {A delicious, pork-hoisin combination wrapped in crispy fresh lettuce and so fun! I mean, who doesn't love eating with their hands!}


 {Get those veggies nice and tender}

 {Stir in the cooked pork, the hoisin sauce and the remaining spices}
 {You should be getting really hungry now! Stir all that sauce in and let it simmer away..}

I've had lettuce wraps at a Thai restaurant before, but these were so much better! The light, sweet Hoisin flavour against the crispy pork and tender veggies make these the perfect summer meal, especially when accompanied by delicious, mouth-watering coconut rice! (I love coconut anything, but coconut rice might be one of my favourite treats! I could eat the whole pot for dinner, no joke!) And they are, I'm sure, much healthier than the take out version! Who knows what goes into those?!

 {Ta-Da!!! Now that is a dinner you can be proud to serve to anyone and everyone! Plus it was super easy to make, everyone's a winner!}

Hoisin Pork Lettuce Wraps
A light, refreshing meal that will leave you feeling guilt-free after you stuff your stomach full of these! Don’t expect any leftovers with these bold flavours!

Time:
Prep Time: 10 minutes // Cook Time: 25 – 30 minutes // Yields: 2-4 servings (4 if you serve with a side of Coconut Rice)

For the Hoisin Sauce
Ingredients:
  • 4 TBSP soy sauce
  • 2 TBSP peanut butter
  • 1 TBSP honey
  • 2 cloves garlic, minced
  • 2 tsp sesame oil
  • 1-2 tsp Srirachi sauce*, or to taste
  • 1/2 tsp ginger powder
  • 1/2 tsp garlic powder
  • Pepper

Directions:
  • In a medium, microwave safe bowl soften peanut butter in microwave for 10 – 15 seconds.
  • Whisk all ingredients together; set aside.

* Srirachi sauce is a spicy chili sauce that can be found in the Ethnic section of most grocery stores, it packs quite a bit of heat so if you don’t like spicy I would recommend starting with 1 tsp.

For the Lettuce Wraps
Ingredients:
  • 2 - 3 lbs ground pork
  • 1 small yellow onion, diced
  • 1 orange pepper, diced
  • 1/2 jalapeño, minced
  • 3 cloves garlic, minced
  • 2 tsp sesame oil, separated
  • 1/2 tsp red pepper flakes
  • Salt & pepper to taste
  • 1 head iceberg or butter lettuce, washed and leaves separated

Directions:
  • In a large pan, heat 1 tsp sesame oil over medium heat; add pork and cook, breaking up the pork, until it is fully cooked, about 5 – 7 minutes; remove from pan and set aside.
  • Drain pan, then add remaining 1 tsp sesame oil and heat, then add onion, pepper, jalapeño and garlic until softened, 1-2 minutes; add pork, Hoisin sauce, red pepper flakes, salt and pepper to the pan and stir to combine; reduce heat to low, cover and let simmer for 5 - 10 minutes or until the sauce is mostly reduced into the meat mixture.
  • Top with toasted sesame seeds, crispy wonton strips and green onions, if desired, and serve on a bed of lettuce, with more lettuce on the side as your wraps.

To make this a complete meal, I serve it with coconut rice!


*this is a base recipe, but you could substitute any protein with the pork; tofu or ground turkey would be great with these flavours.

Wednesday, 14 May 2014

Chicken Potato Chowder

Well the awful flu has invaded our house through Sean, so far I seem to be unaffected (knock on wood) and I'm doing all I can to deter the bug from getting me! Poor Sean has been so sick he’s barely moved for the past two days. So I decided in an attempt to help him feel better I would make him chicken soup, but I'm not a huge fan of chicken noodle soup, so when I found a recipe for a hearty chicken and potato chowder I just knew I had to make it my own! And behold, today he was able to go to work! Chicken soup is a miracle!


Chicken Potato Chowder
A flavourful chowder that comes together in a medley of tender veggies, hearty chicken and a creamy, cheesy base! Whether you’re suffering a sickness or enjoying with a clean bill of health, your sure to feel like a million bucks after a big bowl!
Time:

Prep Time: 15 minutes // Cook Time: 40 minutes // Yields: 4-6 servings

Ingredients:
  • 3 chicken breasts, trimmed and cut into 1” pieces
  • 1 medium onion, diced
  • 6 cloves garlic, minced
  • 4 small carrots, peeled and diced
  • 2 celery ribs, diced
  • 4-5 red potatoes, cubed
  • 4 cups chicken stock
  • 2 c. milk
  • 2 TBSP olive oil
  • 1/2 c. cheddar cheese, grated
  • 1/4 c. flour
  • 1 tsp Franks Red Hot sauce
  • Juice of half a lemon
  • 1/2 tsp dried thyme
  • Salt & pepper to taste


Directions:
  • Heat 1 TBSP olive oil in a large stock pot over medium heat. Add chicken, salt and pepper and sauté until cooked through, about 5 minutes; remove from pot and set aside
  • Add remaining 1 TBSP olive oil to the pot, and then add onions, garlic, carrots and celery and sauté until slightly softened, about 5 minutes. Stir in thyme until fragrant, about 1 minute.
  • Whisk flour into the veggies, slowly stir in chicken stock and milk whisking gently until slightly thickened. Add potatoes, increase heat and bring to a boil, then reduce heat and let simmer for 12 – 15 minutes or until potatoes are tender. Stir in chicken, cheese, Franks Red Hot sauce and lemon juice until the cheese is melted.
  • Serve topped with more cheese, if desired.


Recipe adapted from http://damndelicious.net/2014/01/17/chicken-potato-chowder/

Friday, 9 May 2014

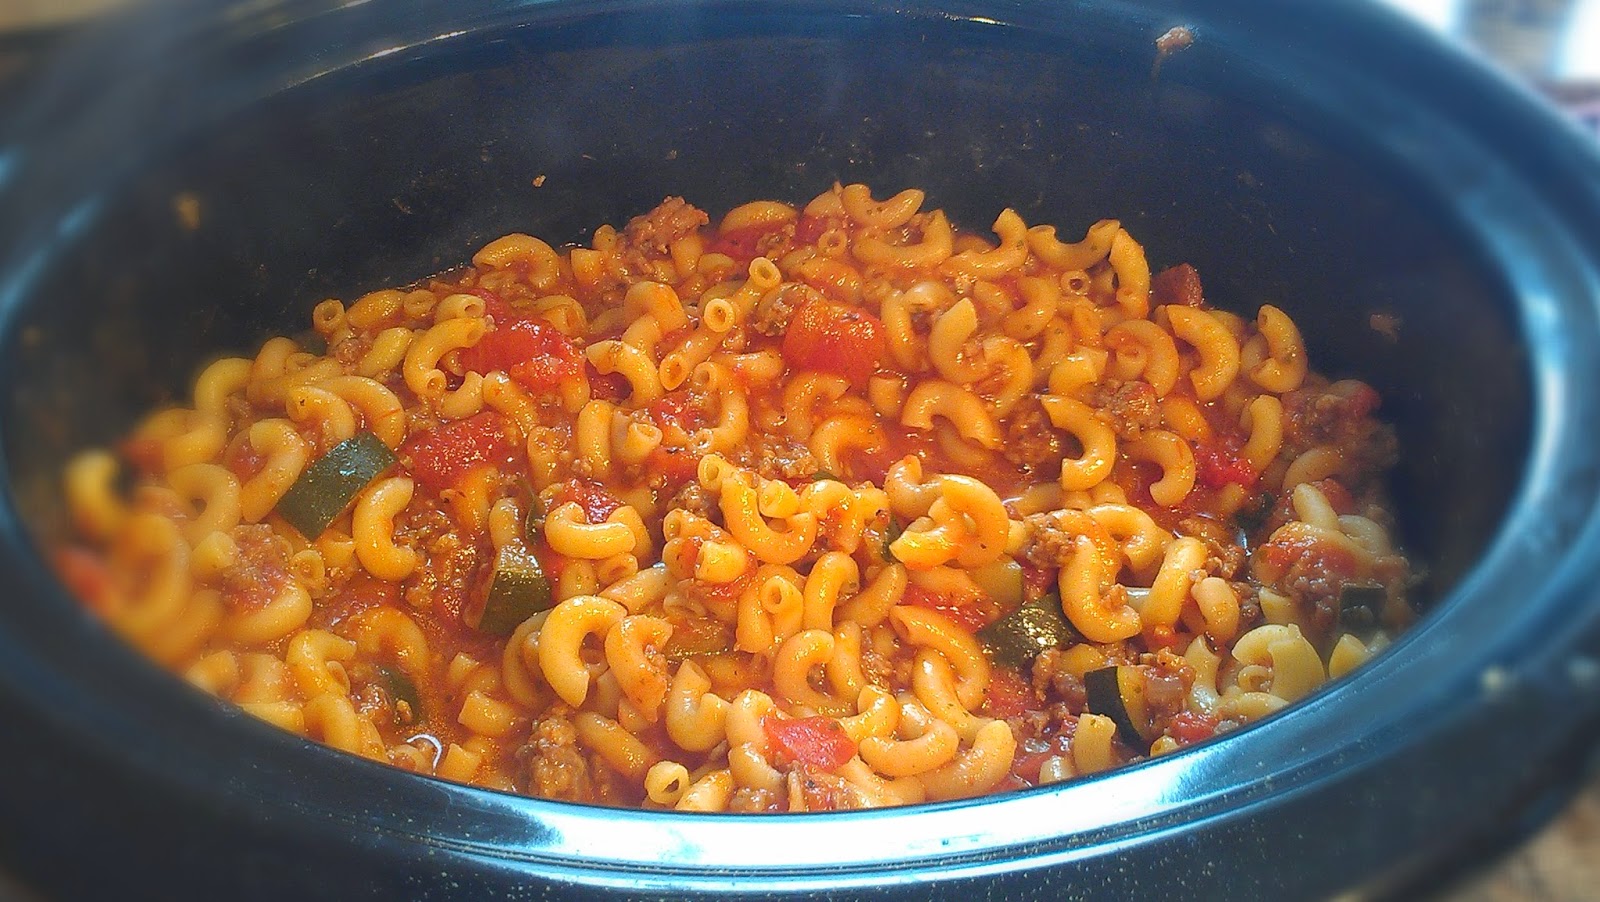
Slow Cooker Macaroni Casserole

It’s been so much warmer lately, and our house just seems to capture and contain all the sunshine from outside! It’s so nice to have a warm house and sun shining outside, but it does present the predicament of turning on the oven or standing over a hot stove top; let’s face it, when it’s sunny outside and you’re trying to soak up the rays the last thing you want to do is spend an hour, or more, prepping and cooking dinner! That’s how I came across the idea for this dish.


We love pasta in our house; it’s such a perfect meal that goes well with a number of sides; garlic bread, Caesar salad, fresh veggies... The possibilities are endless. Since it was Sunday and we like a bit more of a feast, I paired it with my crispy cauliflower bites and almond crusted eggplant and boy, was it a perfect way to end the weekend (followed of course by the latest episode of Game of Thrones)!


All that deliciousness, and easy prep! 


Mmm pasta for a Sunday night, does life get any better?


Slow Cooker Macaroni Casserole

This casserole turned out to be a moist, delicious pasta dish chock full of flavour! Perfect for a well balanced dinner after a busy day!

Time:

Prep Time: 15 minutes // Cook Time: 7 hours // Yields: 4 – 6 servings 

Ingredients:

2 c. vegetable or chicken broth
2 cups water
1 28 oz can of diced tomatoes
2 cups dried macaroni noodles
1 lb ground hot Italian sausage
1 medium yellow onion, diced
6 cloves garlic, minced
1 zucchini, chopped
2 cups pasta sauce of choice
1 TBSP chili powder
1 TBSP dried oregano
1 TBSP dried basil
1 TBSP garlic powder
Pepper to taste

Directions:

In a large pan, heat 1 TBSP grape seed oil over medium heat, add diced onion and sauté until translucent and fragrant, about 4 minutes; add garlic and sauté another minutes then add ground hot Italian sausage and pepper cooking until the meat brown, drain the excess fat and set aside.
Meanwhile, in the crock pot mix vegetable or chicken stock, 1 c. water, diced tomatoes and zucchini. Add the sausage mixture, chili powder, oregano, basil, garlic powder, more pepper and stir until thoroughly mixed.
Set slow cooker on low for 7 hours.
With 30 minutes remaining, add dried macaroni and remaining 1 c. water, stir to combine and turn heat to high.

Serve immediately, topped with grated parmesan and chopped basil, if desired.

*options - This recipe can be amended to you and your family's taste, it would be great with carrots, celery, peppers, or you can sub the hot Italian sausage for ground beef or ground turkey for a lighter option. As with most pasta, the possibilities are unlimited with what you through into that crock pot!

Wednesday, 7 May 2014

Almond Crusted Eggplant

As the weather gets nicer, I am on the search for lighter, healthier side dishes that can be made quickly for a few reasons:

1. I can’t eat as much when it’s hot out.
2. I don’t want to spend as much time in the kitchen.
3. Bikini Season. Enough said.

These reasons all led me to the finding of this recipe, I love eggplant. I always have. As a kid, my mother made the most delicious Eggplant Parmesan, which I have spent many years tweaking and perfecting (Yes, I will post that recipe one of these days!) I don’t know if it’s the tender, soft texture or the delicious flavour that eggplant brings to a meal but it has always been one of my favourite veggies! So you can imagine my delight when I came across this wonderful recipe while roaming the wonderful world of Pinterest (and yes, by roaming I mean wasting meaningless hours scouring for new recipes!)


 mmm delicious lemony, herbed oil.. it really adds a delicious flavour!


Let's face it, breaded food is delicious!


I served up this delicious side paired with my Crunchy Cauliflower bites and a flavourful crock-pot pasta casserole for our Sunday night feast! Everything was a big hit, and we devoured all the eggplant and cauliflower before we even started on the main. They are just that good. If you don’t believe me, try them for yourself and let me know!


Almond Crusted Eggplant

This is the perfect side dish! Soft, tender eggplant crusted with a crunchy almond and oat breading and hints of lemon. You’ll be fighting over who gets the last piece when serving this at your table!

Time:

Prep Time: 5 minutes // Cook Time: 25 – 30 minutes// Yields: 2 servings

Ingredients:

  • 1 chinese eggplants, sliced into 1/4 inch pieces
  • 1/3 c. almond flour (or finely ground almonds)
  • 1/3 c. oat flour
  • 2 TBSP olive oil
  • 2 TBSP apple cider vinegar
  • 1 TBSP lemon joice
  • 1 tsp garlic powder
  • 1 tsp dried basil
  • Salt & pepper to taste


Directions:

  • Lay eggplant on a plate, lightly salt both sides and let sit for 10 – 15 minutes (this will help draw out some of the bitterness of eggplant).
  • Preheat oven to 375°F and line a baking sheet with aluminum foil; set aside
  • In a small bowl combine oil, vinegar, lemon juice, garlic powder, dried basil, salt and pepper.
  • In a shallow dish mix oat flour, almond flour and a pinch of salt.
  • Working one piece at a time, coat the eggplant in the oil mixture and then dredge the almond/oat mixture, pressing to stick; lay in a single layer on prepared baking sheet, when finished all the pieces, pour the remaining oil over for added crisp and flavour.
  • Bake for 15 minutes, then flip each piece and bake another 10 – 15 or until the eggplant is tender to a fork and the coating is crispy.
  • Serve with your favourite dip, or eat as is (they are so delicious you won’t need a dip!)

Emily.xo

Recipe adapted from: http://alimentageuse.com/home/2014/01/23/almond-crusted-baked-eggplant/

Tuesday, 6 May 2014

Crunchy Cauliflower Bites

Lately I’ve been on a bit of a cauliflower kick, probably because it’s such a healthy vegetable and it retains any flavours you add to it. Cauliflower can be prepared in so many ways, try marinating it over night, or seasoning it, or this way: my favourite way to have cauliflower; breading and baking it. The first time I made these Sean and I devoured them in about 5 minutes, the whole head of cauliflower, gone! They really are that delicious!!


I use simple flavours to create this crunchy & tasty side dish, and it can be eaten with any meal.. I mean, who doesn’t love a crunchy aspect to any meal! It’s like eating crispy, cauliflower fries. But so much healthier, and (personally I think) much tastier! You’re not left with the heavy, greasy feeling after but an energetic, lightened feeling although you might be left with remorse that you ate them all and there are no more left.


Soak them in that egg wash to get all that crunchy goodness to stick!


Mmm Spicy breading mixture!!


Almost ready to go in! Is your oven pre-heated??


Oh Crunchy, Golden goodness! Yes!


Crunchy Cauliflower Bites

You’ll be wishing you made a double batch while munching on these crunchy little bites of delight! But the best part? They are healthy, so you can devour as many as you want while feeling great about making healthy choices! Does it get any better?

Time:

Prep Time: 10 minutes// Cook Time: 20 – 30 minutes //Yields: 2 – 3 servings (depending on your self control!)

Ingredients:

1 head cauliflower, washed and cut into bite-size florets
1 c. Panko bread crumbs
1 egg
1 tsp garlic powder
1/2 tsp cumin powder
1 tsp red pepper flakes, or to taste
1 tsp roasted garlic flakes
Salt & pepper to taste

Directions:
1. Pre-heat oven to 375°F. Line with Aluminum foil and lightly oil a large baking tray, set aside.
2. Whisk egg and 2 TBSP water in a large bowl, add cauliflower, salt & pepper and mix well, ensuring all the cauliflower is covered in the egg wash
3. Combine Panko, garlic powder, cumin powder, red pepper flakes and roasted garlic flakes, separate shallow dish.
4. Working one at a time, dredge the egg soaked cauliflower in the Panko mixture, and place in a single layer on the prepared baking sheet. Bake for 20 – 30 minutes, until cauliflower is golden brown and crispy, turning once halfway through

Emily.xo

Thursday, 1 May 2014

Broccoli Cheese Soup

Even thought it was 23+ yesterday, I had a strong craving for some creamy, hearty soup that I just couldn’t shake. I really didn’t want to turn on my oven when I got home to a scorching hot house, but boy, I really wanted that soup! So as always, my stomach won the battle and I turned on that oven to add depths of flavour to this delicious, warming soup; and yes, it was worth every bead of sweat on my forehead. This soup is so chock-full of flavour and cheesy goodness that the first bite reassured me that I had made the right choice; how does that saying go? ‘What the stomach wants, the stomach gets’.. yes, I think that’s it :P


Broccoli Cheese Soup
This thick, heartening soup will warm your soul and dazzle your taste buds with the blend of vegetable goodness and cheesy deliciousness, after all Broccoli & Cheese were made to be blended and gobbled up together!

Time:

Prep Time: 10 minutes // Cook Time: 50 minutes // Yields: 4 – 6 servings

Ingredients:

1.       2 heads broccoli, chopped into florets
2.       1 medium yellow onion
3.       2 large carrots, diced
4.       6 cloves garlic, peeled
5.       4 slices bacon
6.       1 – 1 1/2 c. aged cheddar cheese, grated
7.       4 cups vegetable or chicken broth
8.       2 cups water
9.       2 TBSP grape seed oil, separated
10.   1 TBSP + 1 tsp garlic powder or flakes
11.   1 TBSP cumin powder
12.   1/2 tsp dried thyme
13.   Salt & pepper to taste
14.   1 1/2 – 2 TBSP Franks Red Hot sauce
15.   1 TBSP Dijon mustard

Directions:
1.       Preheat oven to 400°F
2.       In a large bowl, add broccoli, garlic, 1 TBSP oil, 1 TBSP garlic powder, salt & pepper and mix well; place in a single layer on large cookie sheet and bake for 25 – 35 minutes until broccoli is crisp and garlic is golden, flipping halfway through to ensure even baking.
3.       Cook bacon until crisp, place on a paper towel lined sheet, and set aside.
4.       Meanwhile, over medium heat add 1 TBSP oil to a large pot, add onion and carrots and sauté until onions are translucent and carrots are beginning to soften, about 5 – 7 minutes. Add 1 tsp garlic powder or flakes, thyme, cumin, vegetable or chicken broth, water, mix together and bring to a low boil; then reduce heat and let simmer until broccoli/garlic are done baking.
5.       When ready, add broccoli/garlic to the soup, bring back to a boil; reduce and let simmer for 5 - 10 minutes; then, using an immersion blender or transferring batches to your food processor, blend until desired consistency, being careful not to burn yourself by any splatters. (I like mine to be smooth but leave small chunks in for texture, so I use a hand blender)
6.       Add the Franks Red Hot sauce, Dijon mustard and cheddar cheese and mix until cheese is melted.
7.       Serve immediately, garnished with crumbled bacon, more grated cheese and garlic bread or fresh bread if desired,
*Note – you can leave out the bacon to make this a vegetarian soup, just it adds a nice bit of salty deliciousness and texture to the soup

Emily.xo